Windows voice activated macros
(its 100% free - no ads/nags/crypto-miners/etc)About
I recently picked up an occulus rift and found that even with my super whiz bang joystick etc. I had trouble doing 'things' that needed the keyboard and mouse, I would find it much easier to just say whatever I wanted - so with a few days off over xmas and a desire to write something in c#, I thought - why not! - so here we are.
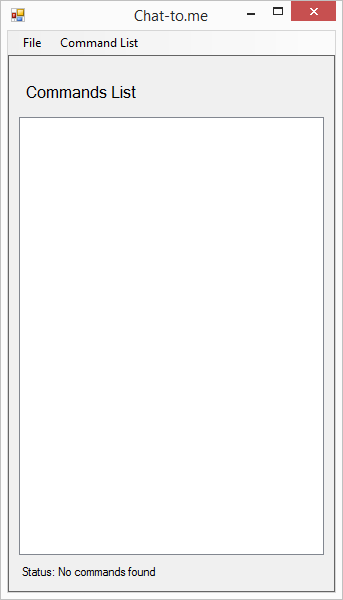
Once you start the application, it should look like the image to the left and its as easy as saying "Computer", the computer will plays a small wave file of my choosing to let me know its listening, I then say "Stop engines" it then hits the 0 thrust in the game I am playing and says "Engines stopped"
By the way, I have tried to keep this as simple as possible, so there is no installer just a single zip file
Unpacked the exe should be about 84ishk, and on first run it will create a small xml file in your "Documents" folder called "chat2me.xml" for storing settings, actions etc.
If you need a hand getting your localised language set up, head over to Language packs or Change your language or keyboard specifically the section on "Add a language" and "Download and install a language pack"
Step 1 - Download ZIP
Unpacked the executable file anywhere you like, it should be about approx 84k, on running the first time, it will create a small xml file in your "Documents" folder called "chat2me.xml" for storing your settings and actions.
Step 2 - Initial Settings

Under the file menu, click the "settings" option, then in the first edit box, type a word that when said, your computer will start listening to you.
You can also select a small wav file that is played when the computer begins listening, this helps when using a head mounted display or you cant see Chat-to.
Lastly, depending on your country and installed voice recognition regions, you can pick your language/region here, I assume by default most English speaking regions come default with en-US.
Step 3 - Creating a Category
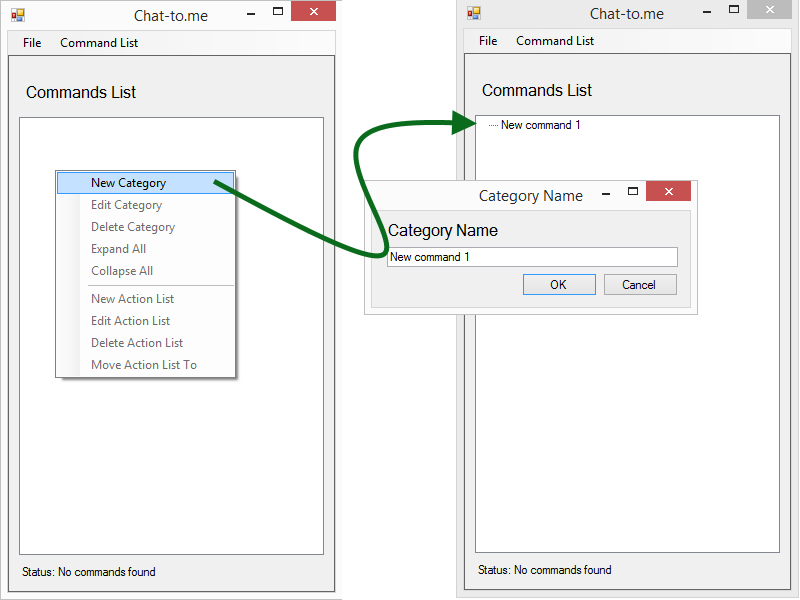
Click the right mouse button while hovering over the tree view and a menu will appear allowing you to do multiple functions, select "New Category" and a Category Creation window will appear.
Type in the name for your new category, eg. "Engine Commands" as we will use this to house all commands relating to the engines. (this will not effect your voice commands in any way, so call it what you like).
Step 4 - Adding an Action
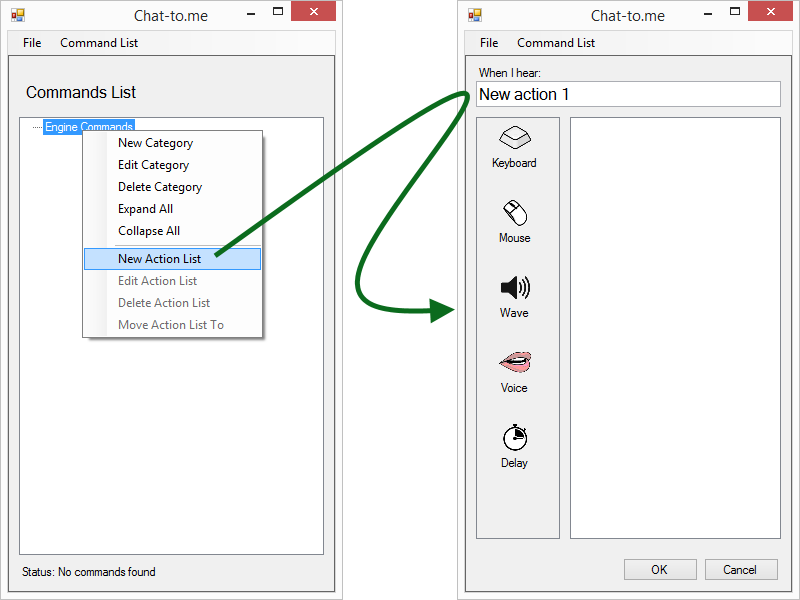
Right click the category you wish to add an action to and click the "New Action List" option.
Using the "When I hear" text box, enter the voice command you wish to say to trigger this action list.
Step 5 - Adding Keyboard
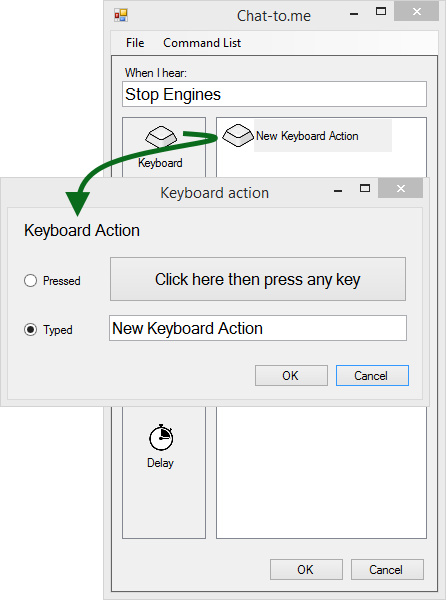
By dragging on what looks like a keyboard key onto the area to the right of it will produce a keyboard entry and a dialog will appear.
Step 6 - Adding Mouse
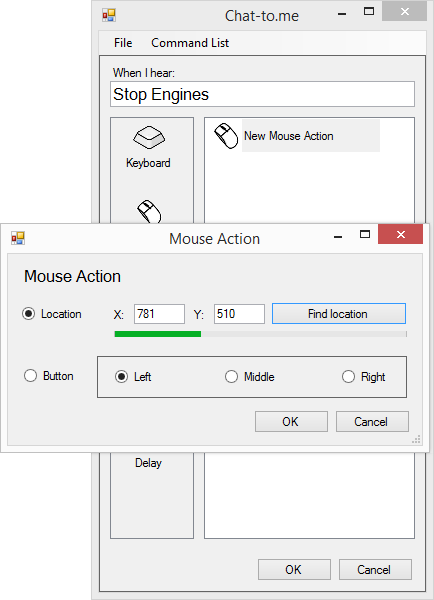
By dragging on what looks like a mouse onto the area to the right of it will produce a mouse entry and a dialog will appear.
Step 7 - Adding Audio
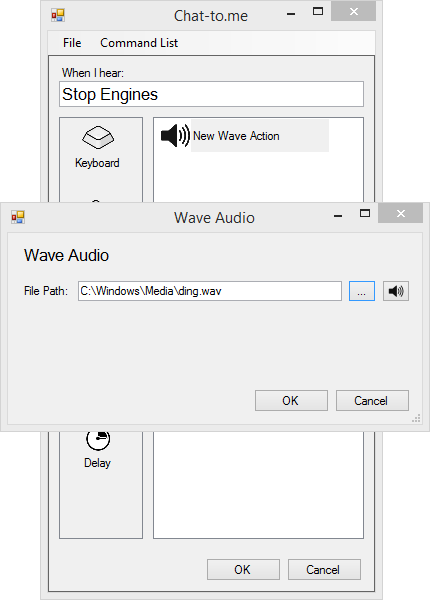
By dragging on what looks like a speaker onto the area to the right of it will produce an audio entry and a dialog will appear.
Selecting the "..." button to the right of the text box, it will bring up a file browser which you can then browse to your desired wav file and select, to preview the sound, click the small speaker icon to the right of the ... button
Use this function for audible queues that your actions have been taken.
Step 8 - Adding Voice
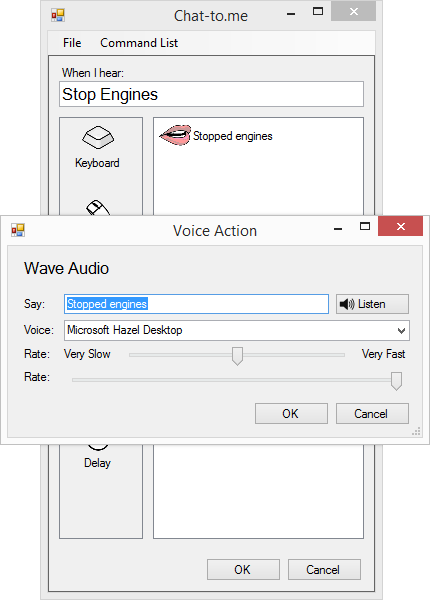
By dragging on what looks like lips onto the area to the right of it will produce an voice entry and a dialog will appear.
Once you have changed all your settings, you can use the "Listen" button to preview the action.
Use this function for audible queues that your actions have been taken.
Step 9 - Adding a Delay

By dragging on what looks like a stopwatch onto the area to the right of it will produce an delay entry and a dialog will appear.
Step 10 - Editing Actions
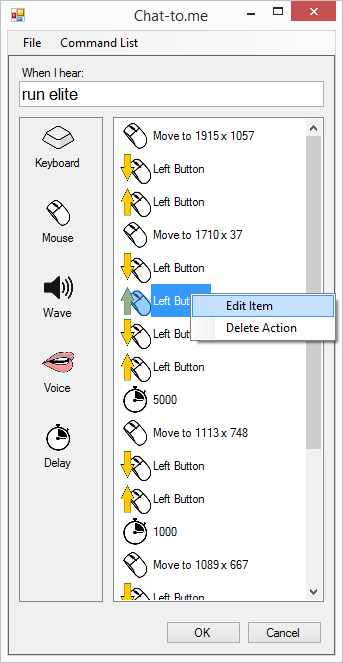
By clicking the right mouse button, an action can be edited, please note - both keyboard and mouse 'down' and 'up' commands cant be edited as there is nothing to actually edit.
Step 11 - Moving Actions
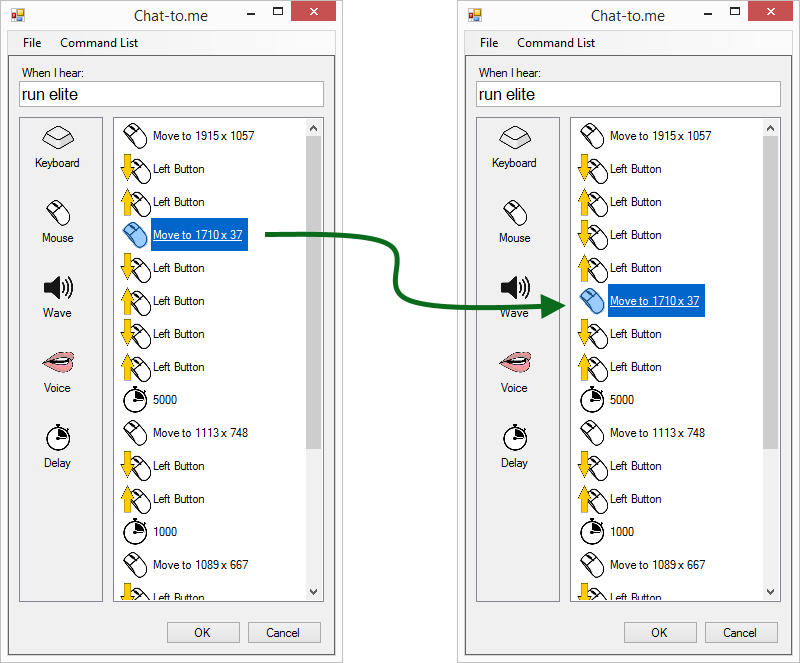
You can move actions up and down just by dragging them.
Step 12 - Fin
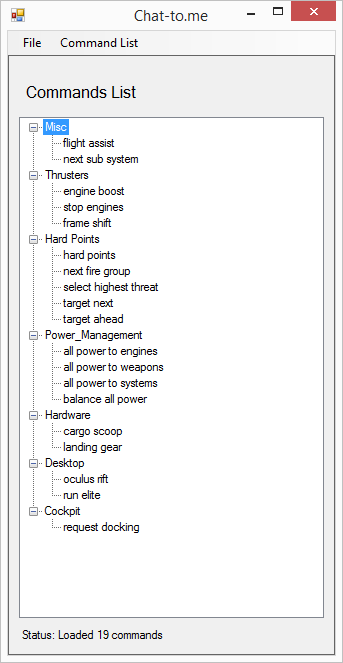
There are no more steps - this is my elite set up as of finishing this app.